


DIY home renovations have seen a major increase since March. Looking for your next home renovation project? How about new floors? We have all the information you need on how to remove your old tile, wood, vinyl, or carpet floors and how to replace them with a luxury vinyl plank (LVP) floor. Not sure where to purchase your LVP? We give Flooret 5 stars! From how they look to their super-easy installation, Flooret has all of your DIY flooring needs!


How To Remove Vinyl Floors
For just about any home improvement project, including DIY flooring projects, Home Depot has you covered. Their blogs will tell you how to do just about anything in your home. If you’re preparing for a DIY flooring project and need help removing old floors, check out their DIY Projects & Ideas.
For removing old vinyl floors, Home Depot recommends you first consider the age of your house. Why? Because homes built before 1980 often used asbestos. If your home was built before 1980, Home Depot recommends you hire an asbestos abatement contractor to test the floors of your home before beginning your DIY flooring project.
Recommended Tools
Home Depot recommends homeowners have the following tools on hand to remove old vinyl floors.
Remove Baseboards
After removing all the furniture from your floors, you’ll need to remove the baseboards. For this DIY flooring project, you’ll need the wrecking and pry bar; and the framing bar. The framing bar will be used to protect your walls while you’re using the pry bar to remove the molding. To remove the baseboards, insert the wide end of the pry bar between the baseboards and the wall and tap on it with the mallet. Gently pull the baseboards off the wall. If you plan on reusing the baseboards, Home Depot recommends marking the backside of it with the location it was removed from so you’ll know where it goes later.
Begin Removing The Vinyl
For this next DIY flooring step, Home Depot shares a little trick about vinyl flooring. Glues or adhesives are generally not used in the middle of the floor. So, for the removal process, they recommend starting somewhere in the middle of your floor. This is where the utility knife comes into play.
- Cut a line down the middle of the floor. Then move 12 inches to the right or left of that line and cut a second line parallel to it. Roll the vinyl as you work your way down the strip.
- Once the strip has been cut, gently lift it until you feel resistance from the adhesive used near the perimeter of the room.
- Use the scraper to loosen the strip. If the scraper doesn’t work, Home Depot recommends using the pry bar and hammer to chip away at the glue.
- When it’s time to remove the perimeter, use the pry bar to chip away at the adhesive. Then use the paint scraper to remove the rest of the adhesive.
Cleaning The Subfloor
When it comes to DIY flooring projects, Home Depot has a lot of tips and tricks, such as their tip for removing adhesive from subfloors. Home Depot advises that the remaining adhesive can be removed off the subfloor with warm water and soap. However, if that does not work, use the heat gun to warm up the stubborn spots and then scrape it off.
Read More: 21 Phenomenal House Cleaning Tips
How To Remove Carpeting
According to Home Depot, the seemingly difficult task for removing carpeting is actually an easy DIY flooring project.
Tools Needed
Home Depot lists the tools needed as:
- Knee pads
- Work Gloves
- Safety Glasses
- Floor Scraper
- Plier Set
- Pry Bar Set
- Contractor Bags
- Tape
- Respirator Face Masks
Prep Work
Home Depot recommends that before you rip up the carpeting you find out where you can dispose of the old carpeting in your home. Your unwanted flooring could become someone else’s DIY flooring project. Earth911 reminds us all that most if not all, carpeting is recyclable and they provide a directory on their website for national carpet recycling centers. Also, before beginning this DIY flooring project, make sure you remove all the doors, closet doors, and bathroom doors first.
Removing The Carpeting
For phase one of this DIY flooring task, Home Depot advises everyone to have a face mask, pliers, work gloves, and protective eyewear before beginning. Use pliers to help you get a grip on the carpeting when you’re first starting. Pick one corner of the room to begin and start ripping the carpeting up, pulling it toward you and away from the tack strip. Home Depot recommends pulling the carpeting up a few feet at a time. Carefully use a utility knife to cut the carpet backing. Roll the carpeting as you’re working and use the tape to secure it.
The carpet padding should be removed in a similar manner as the carpeting, in small sections. The floor scraper will be your lifesaver for this part of your DIY flooring project. Carpet padding is usually stapled to the subflooring and the scraper will make it easier to remove all of the staples after you’ve removed the padding. One final recommendation Home Depot makes for this DIY flooring project is for homeowners to check the subfloor for loose spots and tighten them up before adding the new flooring.
Read More: New Hoover Smartwash Pet Carpet Cleaner
How To Remove Wood Floors


When it comes to removing wood floors from your home, Jen Woodhouse has all the information you need for this DIY flooring project.
Tools Needed
Per her instructions, Jen Woodhouse made a list of the following tools she recommends you have ready for this DIY flooring project.
- Dremel Multimax
- Hammer
- Trim Puller
- 14-in-1 Painter’s Tool
- Box Cutter
- Pry Bar
- 4 lb Fiberglass Engineering Sledgehammer
- Circular Saw
- Diablo 7 1/4″ 24-Teeth Demo Demon Saw Blade
- Knee Pads
- Work Gloves
- Safety Glasses
- Dusk Mask
- Hearing Protection
Baseboards
The first step to removing hardwood floors is to get the baseboards out of the way. Jen Woodhouse advises you’ll need either a painter’s tool or a box cutter for this part of your DIY flooring project. Using one or the other, cut through the caulk at the top of the baseboard and then insert the trim puller where you made the cut and tap on the other end of it with a hammer. Move the trim puller around between the baseboard and the wall to loosen the baseboard up and then pull the baseboard away from the wall.
If nails are getting in your way from removing the baseboard, you can use the Dremel Multimax tool with this DIY flooring project to cut through them. If you intend on reusing your old baseboards, Jen Woodhouse recommends labeling the back of the baseboards so you know what wall they need to be reinstalled on.
Removing Hardwood Flooring
For this step in your DIY flooring project, the circular saw is getting most of the action. Jen Woodhouse advises the blade depth will need to be set to whatever the depth the wood floor is. For example, her wood floors were 3/4″ thick so she set the blade depth of her saw to 3/4″ so the blade wouldn’t cut through the subfloor. If you would like to use your old wood floors for a future DIY flooring project, read this article by The Nest for instructions on how to remove them.
For her purposes, Jen wasn’t going to reuse the wood floors, so she wasn’t particular about where or how she cut them. She made her cuts perpendicular to how the planks were placed to avoid cutting any nails. Next, Jen used the pry bar and sledgehammer to loosen and remove the boards. As the boards were being removed, she bent the nails on the backsides down to prevent anyone from stepping on one. In the final step of this DIY flooring project, remove the underlayment and any additional nails or staples from the subflooring so that the subflooring can be prepared for its new floor.
Upcycle Your Old Wood Flooring
According to an article published on The Nest, the U.S. Environmental Protection Agency reported that “over 6 million tons of wood waste was created in 2003.” Wood waste – such as people disposing of their old wood floors. Instead of taking your old wood floors to a landfill, hop on Google and search for ways to upcycle your wood floors. Home Flooring Pros and This Old House have a list of ways you can use scraps from your DIY flooring project to use in your home.
Read More: Recycling Old Clothes To Contribute To Green Living
How To Remove Tile Floors

For this home project, we’re following step-by-step instructions provided by the DIY Network. They recommend having the following tools to complete this DIY flooring project.
- Carpet Scraper
- Cold Chisel
- Masonry Hammer
- Clear Plastic
- Painter’s Tape
- Roofing Rake
- Flat Shovel
- Dustpan
- Hammer
- Scraper
- Screw Gun
- Broom
- Knee Pads
- Safety Glasses
- Shop Vacuum
Like the other DIY flooring removal projects we’ve mentioned, you’ll need to remove the baseboards as well as any appliances or furniture in the room. DIY Network also recommends covering the vents using the plastic sheets and painter’s tape to prevent dust from settling inside of them. Next, pick any tile on the floor and use the hammer to break it and use the chisel to pry it up. For the remaining tiles, place the chisel against the edge of the tile and tap it with the hammer, popping the tile off the floor. Repeat this step for each remaining tile.
Remove the underlayment, and if necessary, use the screw gun to remove the screws that are holding the underlayment to the subfloor. The roofing rake and flat shovel will assist you with this DIY flooring project, to help pry up the underlayment. Finally, use the carpet scraper to remove any adhesive remaining on the subfloor. Use the vacuum or broom to clean the subfloor. After this final step, you’re ready to install your new floors.
Read More: How Air Duct Cleaning Impacts Your Indoor Air Quality
Preparing For Your New LVP Floors

After all the stress and aggravation of trying to remove old flooring, the last thing anyone wants or needs is taking on another difficult and aggravating task. That’s why, when it comes DIY flooring projects we highly recommend the Modin Collection by Flooret. The Modin Collection is rigid vinyl plank flooring. The planks are extra long, scratch-resistant, and have a 40 mil wear layer, making this flooring durable, long-lasting, and very high quality. Not only that, but the Modin Collection also has the underlayment pre-attached.

The click-floating flooring offered by Flooret can be installed over a variety of different floors such as sheet flooring and tile, ceramic flooring, marble flooring, and terrazzo flooring. However, the existing flooring must be in good condition and not be warped. Flooret strongly recommends not installing click-floating flooring over heavily cushioned floors such as the rubber flooring used in many gyms or cushioned vinyl flooring.
Flooret also advises against installing its click-floating flooring over hardwood floors and laminate floors. Both types of flooring are very sensitive to moisture and if you install click-floating flooring over either, you risk trapping moisture in the subfloor which can cause the old flooring to warp underneath your new flooring. In the event that you need to remove your old floors before installing the new flooring, we’ve put together a step-by-step guide to get you through this DIY flooring project.
Preparing the Subfloors
Step one for installing Flooret Luxury Vinyl Plank floors in your home begins with the subfloors. The subfloors must be cleaned thoroughly before you begin. Carefully inspect your floors to make sure they are flat. Flooret emphasizes that the flatness of a floor is more important than it being level. They recommend the flatness be 3/16″ within 10 feet. As long as your floors are flat, it doesn’t matter if they slope.
There are three concerns Flooret expresses regarding floors that are not flat. First, if the floors are not flat, there could be complications with the clicking mechanism coming loose over time. Second, telegraphing – an impression on the subfloor becoming visible on the wear layer – is another issue to be aware of. Finally, if the subfloor isn’t flat, air pockets can develop underneath the planks producing a hollow sound when someone is walking across them.
Flattening a subfloor is going to depend on what kind of subfloor you have. According to The Spruce, today’s builders are likely to use one of two types of subfloors: plywood or oriented strand board (OSB). Luckily, the process for flattening these two floors is the same. According to Hard Wood Floors Magazine, sanding the seams in the floor is the best place to start. They recommend using either an edger or a buffer. Once the subfloor is flat, clean all the debris off of it using a broom or vacuum cleaner.
Undercutting The Doors And Door Jambs
SF Gate explains the next step in installing LVP. Undercutting is the process where the doors and door jambs are cut at the bottom so that the flooring will slide underneath. SF Gate recommends using a handheld jamb saw for this task. For step-by-step instructions on how to undercut the doors and door jambs in your home, we highly recommend watching YouTube videos on this process. SF Gate also provides step-by-step written instructions. In addition to the saw, they recommend you have the following tools:
What Direction To Lay The Flooring


The good news is, there is no right or wrong answer to this question. However! Flooret recommends the flooring be laid “in the direction of the longest run of the focal point of your home.” Whatever way you choose to place your planks, the planks – for aesthetics – should run the same direction throughout your home. If you need to change directions from one room to the next, Flooret recommends using a T-molding to divide those spaces.
Read More: Cleaning Without Chemicals
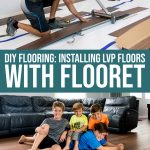
DIY Flooring: Installing Flooret LVP In Your Home


These DIY flooring instructions are for the click-floating version and do not apply to the glue down version. The installation kit used in Flooret’s videos can be purchased from Amazon. The full video tutorial on how to install the click-floating flooring is available here. Here are the written instructions for installing click-floating flooring provided in Flooret’s video tutorial.
- Make sure the subfloor is thoroughly cleaned and also flat.
- Measure the floors to determine their length. Flooret advises NOT to end with a 1/2″ strip. If that’s a possibility, the very first plank will have to be resized to prevent this from happening.
- Run the flooring longways.
- Pull the flooring from multiple boxes at one time to avoid having identical pieces next to each other on the floor.
- Begin installation by working from the left side of the room to the right.
- Insert spacers in the edges of the room where the floor will make contact with the wall, allowing for a 1-4″ gap.
- Connect the short end of the second plank to the first plank.
- Measure the space where the last plank will go to determine how much needs to be trimmed off that plank. DO NOT to end with a 1/2″ strip.
- Second Row. Start with a piece that’s a different size than the plank that’s adjacent to it to create a staggered pattern on your floor.
- Insert the long end of the plank first and slide it toward the end of the previously installed plank until the tongue touches the groove.
- Use the tapping block to ensure a tight fit with the adjacent row.
- Next, use a bridging technique with a scrap piece of flooring to bridge the two boards that are almost touching. This will create a track for the floor to follow.
- Tap the end of the plank with a tapping block and hammer to lock the planks together.
- When you get to the end of the second row, repeat #8 and use the pull bar to ensure a tight fit.
- Remaining Rows. Repeat steps 1-14.

For additional questions related to your DIY flooring project, please visit Flooret’s Knowledge Base. Flooret has all the information you’ll need when it comes to installing LVP flooring on stairs, how to transition between two floors of differing height, and more!
Read More: House-Cleaning Tips And A Weekly Schedule
SHOP:
Modin Collection
EXPLORE AND CONNECT:
Flooret | Facebook | Instagram | Twitter | Youtube | Pinterest | Houzz

DIY flooring projects don’t have to be stressful. Flooret designed its LVP flooring to be easily installed. Their knowledge base has all the information you’ll need to give your home fresh, new floors. Their video tutorials provide step-by-step instructions on installation. The best part about Flooret is that they are owner-operated. That means if you have a question their knowledge base doesn’t cover, when you call them, an owner will be there to help you out.
WANT TO READ MORE?
Check out this article on Flooret: The Best New Flooring for Your Home.
💖 NEWSLETTER: DAILY READS IN YOUR INBOX 💖
Sign up to receive our picks for the best things to do, see and buy so you can relax and focus on more important tasks! Let us help you be the best version of yourself you can be!
GET MORE FROM DAILY MOM, PARENTS PORTAL
Newsletter: Daily Mom delivered to you
Facebook: @DailyMomOfficial
Instagram: @DailyMomOfficial | @DailyMomTravel | @BestProductsClub
YouTube: @DailyMomVideos
Pinterest: @DailyMomOfficial
📌 LOVE IT? PIN IT!📌

Photo Credits: Pixabay
Sources: Removing Vinyl Floors – Home Depot | Removing Carpet – Home Depot | Earth911 | Jen Woodhouse | The Nest | Home Flooring Pros | This Old House | DIY Network | The Spruce | Hard Wood Floors Magazine | SF Gate | Flooret


