


 Will Love")


Even though we are not under stay at home orders anymore, most of us are still spending more time at home than ever before. That means that there are many opportunities for home improvement projects. If your garage looks like this, then a Garage Floor Epoxy Kit from Daich Coatings may be the perfect home improvement project for you to tackle.

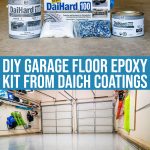
This Garage Floor Epoxy Kit is an effective new way to add visual appeal and excellent durability to all kinds of demanding interior concrete floor surfaces. The Daich Coatings Garage Floor Epoxy Kit locks firmly into your concrete and shields it from stains, impact, hot tires, continual heavy traffic, chemicals, and more.

Here are some of the features and benefits of the Daich Coatings Garage Floor Epoxy Kit:
- Water Resistant
- Salt Damage Resistant
- Chemical Damage Resistant
- Impact & Abrasion Resistant
- Resists Hot Tire Pickup
- Freeze & Thaw Protection
- Mold & Mildew Resistant
Not only does the Garage Floor Epoxy Kit improve the surface of your garage floor, but it provides you a golden opportunity to organize your garage. Just be warned, your donation pile will likely be much larger than you anticipate!
Applying Garage Floor Epoxy may seem a daunting task, but clearing out your garage is the hardest part. The process is pretty quick with the drying times being the factor that causes the project to span several days. All you need to do is pick a dry weekend to move your garage collection outdoors, then roll up your sleeves and get working.
READ MORE: THE BEST OPTIONS DIY HOME IMPROVEMENT PROJECTS DURING COVID-19
Step 1: Clear Out The Garage
This step has already been relayed, but it bears repeating!
Step 2: Remove Debris
Anything stuck to the floor of the garage needs to be scraped off. Then, the entire garage floor needs to be cleaned with a shop vac.


Soon you will have a garage that looks like this.

Step 3: Wash Garage Floor & Wet Vac
Yep, you need to take a hose to your entire garage floor then use your shop vac to wet vac the dirty water up.

We actually used a broom to make sure the water was evenly distributed before vacuuming up the water.
Step 4: Apply Concrete Cleaning Crystals Mixture
There is a package of concrete cleaning crystals in your Garage Floor Epoxy Kit. It needs to be mixed with water and applied to your newly cleaned garage floors. It is suggested to use a water canister that you would use to water your plants, but you may want to buy an inexpensive one for this use and not reuse it on your plants.

Another suggestion is to wear some old pants that you do not care about because the mixture will likely splash up on your legs since it is acidic as evidenced by the fizz created when it hits your garage floor.


You will need to let your floors dry overnight. The next morning before you start Step 5, go ahead and apply painters tape along the edges to make sure that the epoxy does not end up where it should not be!
READ MORE: DIY- A RECIPE FOR FOR BUDGET-FRIENDLY BATHROOM RENOVATIONS
Step 5: Mix The Epoxy Resin (Part A) and Epoxy Resin (Part B)


There are two cans in your Garage Floor Epoxy Kit From Daich Coatings. You’ll need to mix the two together using a steel mixer that attaches to a power drill.


Pour the mixture into paint trays and quickly start applying it to your garage floors.
Step 6: Apply Epoxy Mixture (The Quicker The Better)
The epoxy congeals quickly so you’ll need to move fast. In fact, it may be better to have two paint trays, rollers, and long handles that connect to your roller. You will need to do a section at a time and flip flop between Step 6 and Step 7 as you move along.


Step 7: Apply Decorative Broadcast Flakes
This step is optional, but it is the flakes that provide the traction so we recommend it. It is also the fun part of the project. There are two methods for spreading the flakes – confetti or spice. Confetti is clearly more fun as you can throw up the flakes and watch how they disperse widely. However, this method is a little hard at the edges where your epoxy ends before starting the next section so you’ll need to switch to the spice method … as if you are sprinkling spice as you are preparing a dish. Either way, the flakes are fun to apply!

Switch between Steps 6 & 7 until the entire garage is completed. Then wait 24 hours for the floors to dry.
Step 8: Lightly Sand Floors, Then Shop Vac The Dust
Once your floors dry overnight, it is time to remove the painters tape along the edges and start sanding.


Sanding roughs your floors up ever so slightly so that the concrete sealer in the next step adheres properly. The best part about this step is that the kids can help.

Once the floors are sanded, it is time to shop vac again!
Read More: 8 THINGS YOU NEED TO CREATE THE SMART HOME OF YOUR DREAMS.
Step 9: Apply Daihard Garage & Driveway Sealer

Daihard Garage & Driveway Sealer is an easy pre-mixed protective coating that forms a tough, clear barrier resistant to water, salt, abrasion, impact, chemicals and more. And with great resistance to hot tire pickup and tire marking, it helps keep garage floors and driveways looking good. It also serves as an excellent low VOC top coat for the DaiHard Garage Floor Epoxy Kit. You will need to roll two coats for a lasting, satin sheen. Wait 3 hours between coats and another 24 hours before moving your items back into your garage.
Step 10: Move Your Items Back Into Your Garage
But first take a photo because your garage will never look this good again!

This is a great opportunity to get organized so buy some steel cabinets and shelves for your garage and put items back in a way that actually makes sense. Once you know where everything in your garage is, it is so much easier to put things back in place. And now that your garage looks like this, you’ll want to spend a lot more time in your garage!

A Garage Floor Epoxy Kit from Daich Coatings is a DIY project that almost anyone can complete. The hardest part is cleaning out the garage, and let’s be honest, we all need to do that every so often. So get the most out of the effort by applying epoxy to your garage floors. As you can see, it makes a huge difference to the aesthetics of your garage but it also has practical purposes as well.
SHOP:
Garage Floor Epoxy Kit | Garage & Driveway Sealer
EXPLORE AND CONNECT:
Daich Coatings | Facebook | Instagram | Youtube
WANT TO READ MORE?
For more DIY project ideas, read Hunter Fan Company: Beautiful Lighting That Wows.
💖 NEWSLETTER: DAILY READS IN YOUR INBOX 💖
Sign up to receive our picks for the best things to do, see and buy so you can relax and focus on more important tasks! Let us help you be the best version of yourself you can be!

GET MORE FROM DAILY MOM, PARENTS PORTAL
Newsletter: Daily Mom delivered to you
Facebook: @DailyMomOfficial
Instagram: @DailyMomOfficial | @DailyMomTravel | @BestProductsClub
YouTube: @DailyMomVideos
Pinterest: @DailyMomOfficial
📌 LOVE IT? PIN IT!📌


")


