



























Beautiful photography has very little to do with your camera, although a decent camera does help. The photos you take and the results you get are completely dependent upon the amount of light available, and your understanding of how to use that light. For the past few weeks, we’ve been experimenting with aperture, shutter speed and ISO. You may have even switched your camera into “Manual” mode, but there’s a few more things we need to talk about before we put it all together.
Which brings us to this week’s lesson: white balance. Specifically, we’re going to talk about the “color of light,” and how to use that “color” to enhance your photos.

What is White Balance?
White balance measures the color of the light. All light emits a particular color. For example, “sunlight,” often referred to as “white light,” contains every shade in the color spectrum over the course of the day.
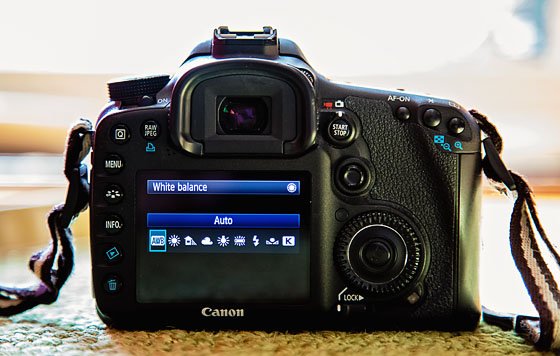
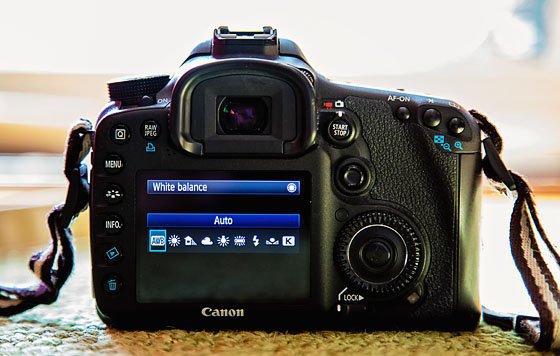
DSLR cameras have the ability to preset various white balances. Let’s take a look at each preset, what it means, and how to best use it.

Auto White Balance or AWB is the default setting for DSLRs which guesses based on scene evaluation. Generally, your camera will bias towards the most intense light source and set the white balance to match that source.

We decided to take a photo using the AWB setting as a baseline. Watch how the color of light changes with each of the following white balance presets.

The “daylight” white balance preset is based on the temperature of the light at noon without any cloud coverage. However, as we all have witnessed, the colors emitted during the day can vary based on location, time and the sun’s position.
For example, on a clear, bright day, you may notice a soft yellow cast during the morning. At midday, you may notice a cooler, bluer color cast. And in the late afternoon, you may notice a warmer, orange color cast. Depending on the mood you’re going for, you may prefer to shoot in the morning or afternoon.

If you’re shooting during the day, it may be just as easy to use AWB. However, the “Daylight” setting can be fun to experiment with at night as it will capture all of the colors emitted from artificial lighting.

As we suggested in our article, “How to take Photos of Your Children During Full Sun,” shade will be your best friend when you want to take some photos during the middle of the day. However, the shade has a tendency to produce “cool” images, meaning that your photos will appear a little blue. Using AWB doesn’t always work in these situations.

Instead, try using this preset. This setting will add a touch of yellow to your images to warm them back up. You can also try using this preset early in the morning or evening to enhance the golden tones.

Much like shooting in the shade, cloudy or overcast days tend to cause confusion for AWB and often produce cool or blue images because the color cast on an overcast day will vary depending on the cloud cover. This preset will also add warmth to your photos. It can also be used at twilight or sunset.


This setting is almost not applicable for most homes since U.S. President George W. Bush signed a federal energy bill phasing out energy-wasting light bulbs six years ago. Although this preset is best used with those old 60-watt incandescent light bulbs, you can also use it with newer halogen incandescent bulbs.


Although most fluorescent light bulbs are daylight balanced, some of the newer compact fluorescent light bulbs are not. In fact, this setting won’t work well at all for those compact bulbs. However, if you are finding that your photos look green, try this preset on for size.


Depending on your DSLR, once flash is activated or an external flash is attached to your camera’s hot shoe, the AWB will activate the flash white balance setting. If for some reason it does not, or your photos are too cool (blue), try manually activating the flash preset. Flash color should be close in color to daylight.

Setting a Custom White Balance
Now that we’ve walked through your camera’s basic white balance presets, let’s talk about custom white balance.
If you want to really nail your white balance (or overcome bad color casts), skip the presets all together and customize your white balance. This will force your camera to set its white balance for the exact lighting situation in which you’re shooting. Of course, setting a custom white balance is camera specific, but we’ll walk you through the process.
Step 1
Locate the custom white balance setting on your camera. We selected ours by pressing the “WB” button on the back of our camera and moving the dial to the right to locate the custom white balance option. Every camera will be slightly different, so refer back to your manual if you need to.

Step 2
Find a plain white piece of paper (or posterboard or cardstock) to photograph. Take that piece of paper with you to be photographed.
Product Recommendation


Alternatively, you can use a “Grey Card.” We use Lastolite’s 12 inch Ezybalance Card. You can either set your white balance in camera or use your image of this collapsible card in post-production.
Step 3
Hold the paper (or grey card) out in front of your camera so that it fills the entire frame. It doesn’t have to be in focus, it just has to fill the frame. (If your camera won’t take the photo because the object is too close to the lens, switch to manual focus for the shot, then switch back to auto focus.)
Step 4
On your camera’s menu locate the Custom White Balance setting again. Your camera will ask you to select the photo you just took. Set this as your custom white balance.
Practice
Now that you know a little more about white balance, it’s time to put these ideas into action. You can use either Aperture Priority, Shutter Priority or Manual for today’s practice assignment. You can also choose to stay inside or outside, in the shade. Just don’t use a flash.
- As we did with the bubble machine in the images throughout today’s post, photograph a still object or subject (as with our previous tutorials, we find it easiest to practice on toys or still life that won’t run away from you) using the AWB setting.
- Now select the tungsten white balance setting and take the photo again.

3. Create a custom white balance using the steps above and take the photo one more time.

4. Upload your photos and compare the results. If you want, you can even test drive some of the other white balance presets.
With all that said, there’s still much to learn about white balance (for example, Kelvin), but we’ll save that for another day. Keep experimenting with your camera and have fun. And of course, don’t hesitate to ask questions in the comment section if you need a little help. Only a few more weeks before we put it all together!
For more lessons on getting to know your camera, check out our post on ISO Basics.
Photo Credit: Ashley Sisk