During our “Getting to Know Your Camera” series, we talked at length about adjusting your camera’s buttons for proper exposure. Whether you’re shooting at 9 am, noon, sunset or in low light, the same principles apply. Low light simply provides us with a little more of a challenge and three key choices:
- Avoid shooting after sunset. Just put your kid to bed and hope they don’t do anything cute after dark.
- Create more light yourself. It doesn’t have to be a flash, but if you must use your flash, don’t use the pop up kind.
- Change your camera’s settings to respond to the light that is available and embrace it!
Proper Exposure in Low Light
A lot of people seem to get tripped up on proper exposure in low light situations, but it doesn’t have to be complicated. Simply expose your image just as if you were shooting during the day!

Your best shot at taking a well exposed image in low light requires you to have a lens with a wide aperture to allow lots of light in. We particularly like the 50 mm f/1.8. It’s a “cheap” lens, but by shooting wide open at f/1.8, you are letting in four times more light than you would be if you were using your kit lens at f/3.5. Shooting with a wide aperture will produce a shallow depth of field though, so if that’s not what you’re going for, be sure to increase your shutter speed or slow down your shutter speed.
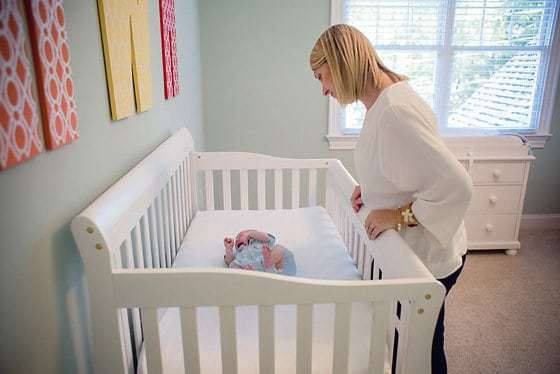
If you’re photographing a person (maybe your child), spot meter off of their skin and expose it as you normally would. Your Straight Out of the Camera (SOOC) shot may not look exactly as it does to the naked eye, but it will be properly exposed.
You can even “expose to the right,” meaning that your image will be slightly overexposed. If you are shooting RAW, you’ll pack as much information as possible into the RAW file which will allow you to adjust the exposure in post-processing without losing any information. Alternatively, you can brighten an underexposed image, but it usually results in lots of ugly noise or grain.
White Balance
Much as we discussed about exposure, you’ll want to adjust your white balance just as you would if you were shooting during daylight hours.

First, consider your light source. Then choose the right temperature and start shooting. Or you can use a “gray card” to set a custom white balance. Set your exposure, fill your frame with the Ezybalance card, point your camera toward the main light source in your image and set a custom white balance. Then start shooting.
Noise Reduction
Low light photography and noise go hand-in-hand. If you don’t mind a little noise, raise your ISO, convert to black and white, and enjoy your photos. However, we realize that not everyone is a fan of the grain that often comes from dimly lit images. The best way to minimize that noise or grain is to expose to the right. Most simply put, this means that you are overexposing your image. If you have a Canon camera, the indicator on your histogram will literally move to the right.
You can also reduce the noise in your images during post-processing. Both Lightroom and Photoshop have noiseware built in.
Add Your Own Light
In the absence of natural light, you can always try to add light to your images, and that doesn’t mean you have to use a flash. Try using a flash light, or using light from another room to add dramatic lighting to your images.

If you must use a flash, we strongly discourage pop-up flashes. Instead, we prefer an external flash or speedlight. You’ll achieve better results if you are able to bounce the light off of a wall or ceiling. Set your ISO to 200, your aperture to f/4 and your shutter speed to 1/50. We call this “dragging the shutter” (we’ll go into more detail about this technique in the future). Then, point your flash 45 degrees behind you and start shooting for a more natural light look. You can also use a diffuser to tone down the harness of the flash.
Experiment!
Lastly, don’t be afraid to experiment with exposure, lighting and/or your editing process when it comes to low light photography. Too often, you’ll have a vision of what you want an image to look like and proper exposure may not always capture the image in the same way your imagination so effectively did. Take a few test shots to see what you’re working with. Lower your exposure. Add lighting. Or just wait until you upload your images to your computer and play with the editing. Either way, have fun with it.
You see? Low light photography isn’t so bad. With these tips, you should be more than ready to photograph your children or whatever else you want all winter long!
Photo Credits: Ashley Sisk


